







A door knob can leave a clean, round crater in a hallway wall. A plumbing repair can leave a larger opening behind a vanity. A moved outlet, a bumped piece of furniture, or an old wall anchor can create damage that is small in size but hard to ignore. Quality drywall hole repair is not just about filling the opening. It is about restoring a flat, solid surface that accepts paint evenly and does not reveal the repair every time light hits the wall.
For homeowners in Macomb County and Metro Detroit, the right approach depends on the size of the hole, the condition of the surrounding drywall, and what may be behind it. A small patch can be a reasonable weekend project. Larger damage, recurring cracks, water exposure, or repairs near tile and cabinetry deserve a closer look before anyone reaches for joint compound.
Start With the Cause, Not Just the Hole
Before repairing drywall, identify why it was damaged. A one-time impact from a door or furniture move is usually straightforward. Repeated damage in the same spot may point to a missing door stop, loose framing, an improperly secured handrail, or a door that swings too far.
Water damage changes the conversation. Drywall that feels soft, stains through paint, crumbles at the edge, or has a musty odor should not simply be patched over. The moisture source must be corrected first, whether it is a plumbing leak, roof issue, condensation problem, or failed caulk around a bathroom fixture. Installing a clean patch over damp material can trap the problem and lead to more extensive repairs later.
It also helps to know what is inside the wall. Electrical wiring, plumbing lines, ductwork, and blocking may sit close to the damaged area. If the hole is the result of recent work, such as a relocated fixture or plumbing access, take a moment to inspect the opening before closing it. A professional can confirm that the area is safe, properly insulated where needed, and ready for a durable repair.
Drywall Hole Repair by Hole Size
The method should fit the damage. Using too much compound on a small hole can create a raised spot. Trying to cover a large opening with mesh alone can leave a weak repair that cracks or flexes.
Nail holes, pinholes, and small dents
Tiny holes from picture hooks, nails, and small anchors generally need lightweight spackle or setting-type joint compound. The key is restraint. Press material into the hole, scrape away the excess, let it dry fully, then sand lightly with a fine-grit sanding sponge. A second thin coat may be needed if the filler shrinks.
The repair may be technically sound but still show through fresh paint if it is not primed. Dry filler absorbs paint differently than an existing painted wall. A small coat of primer helps the finish coat blend more consistently.
Holes up to a few inches wide
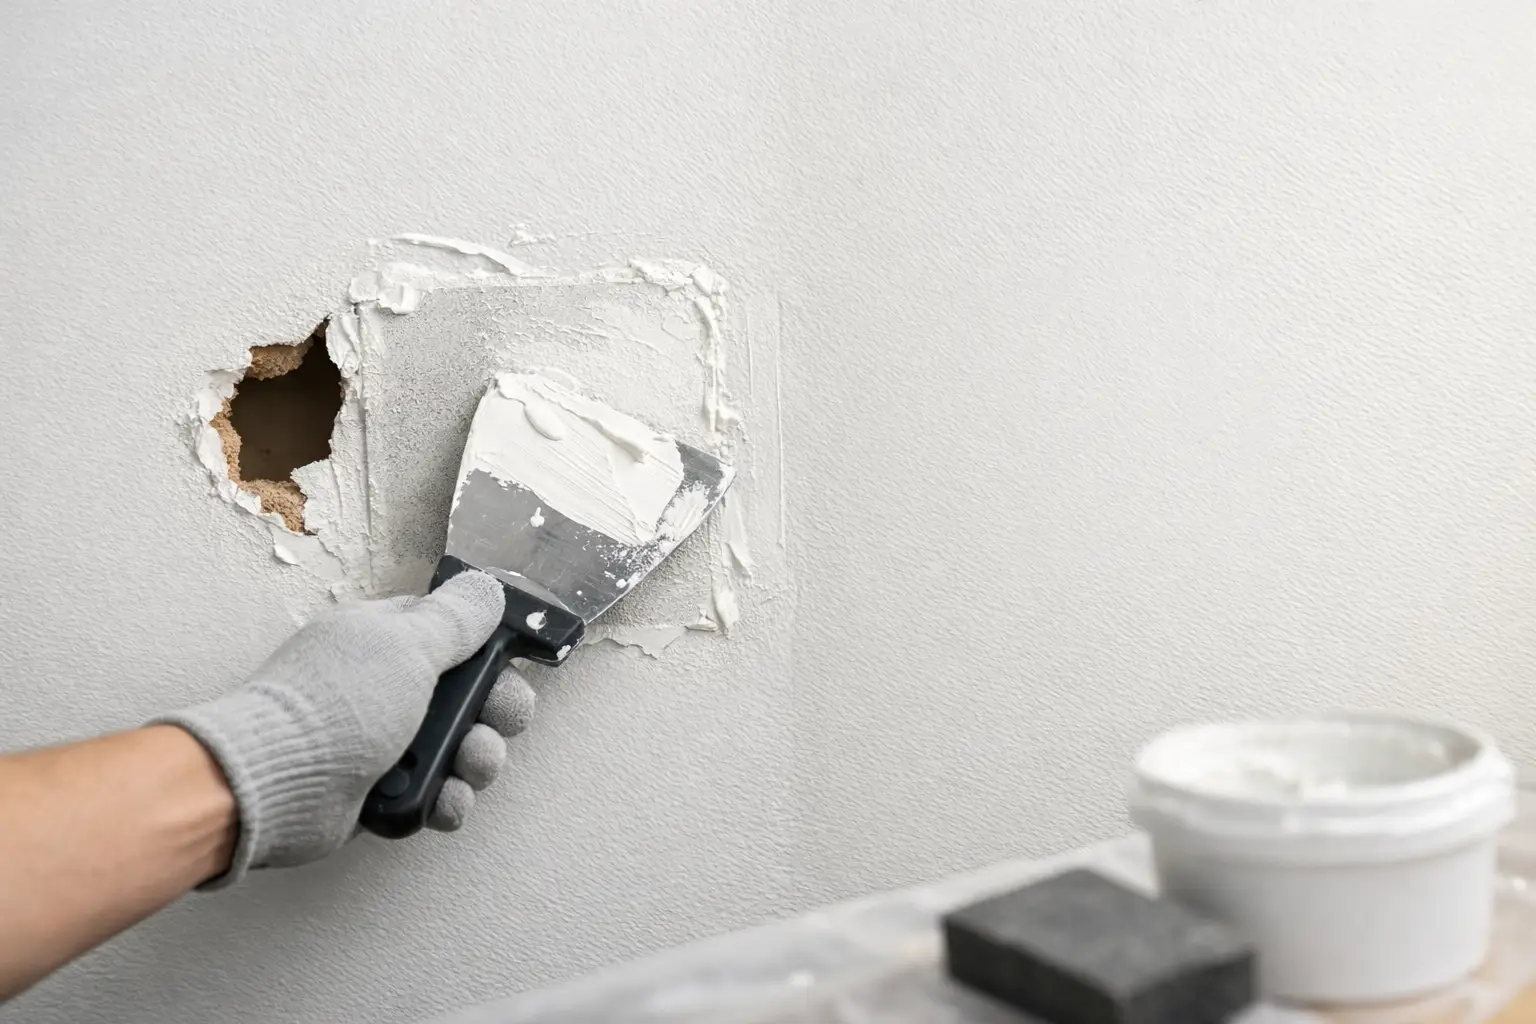
For a medium-sized hole, a self-adhesive mesh patch or a thin repair plate can work well when the surrounding drywall is firm. Joint compound should extend several inches beyond the patch edge in thin, feathered layers. This wider transition matters. A patch that is only coated at its edge often creates a visible square or circle after painting.
Apply multiple thin coats rather than one thick coat. Thick compound takes longer to dry, is more likely to shrink or crack, and requires heavier sanding. Each coat should become slightly wider than the last, gradually blending the repair into the wall plane.
Large holes and cutouts
A hole larger than a few inches, an irregular opening, or a drywall section removed for plumbing or electrical work generally needs a fitted drywall patch supported by backing. The damaged opening is cut into a clean shape, wood backing or repair clips are installed behind the existing wallboard, and a new piece of drywall is secured in place.
The seams are then taped and finished with compound. Paper tape is often a strong choice for flat seams when properly embedded, while mesh tape can be useful in certain repair situations. What matters most is a stable patch, proper tape coverage, and carefully feathered finishing coats. The goal is not merely to hide a seam. It is to prevent it from telegraphing through the paint over time.
Why Flatness Matters More Than Filling the Opening
Drywall is unforgiving under side lighting. Hallways, stairwells, kitchen walls, and bathrooms often have light that runs across the surface rather than directly at it. That lighting exposes ridges, sanding marks, and uneven patch edges that may not be visible from straight on.
A well-finished repair uses broad, controlled passes of joint compound to create a gradual transition. It also requires sanding with care. Aggressive sanding can tear paper facing, expose the mesh patch, or create a shallow depression around the repair. If the wall surface has orange peel, knockdown, or another texture, the repaired area must be matched before painting.
Texture matching is one of the most underestimated parts of drywall repair. A smooth patch on a lightly textured wall will stand out, even if the patch itself is flat. Conversely, a heavy spray texture can look artificial if it is not blended into the surrounding surface. Test the texture on scrap material or an inconspicuous area before applying it to the finished repair.
Paint Can Make or Break the Result
Many homeowners are surprised when a smooth patch is still visible after painting. This is often a paint and sheen issue rather than a drywall issue. Primer is essential over new joint compound, especially when using satin, semi-gloss, or other reflective finishes. Without it, the patch may flash, meaning it absorbs the topcoat differently and appears duller or shinier than the surrounding wall.
For the closest match, use the same paint color and sheen already on the wall. If the existing paint is older, faded, or unavailable, touching up only the patch may still leave a visible difference. In those cases, painting from corner to corner on the repaired wall usually creates the most uniform finish.
Bathrooms and kitchens deserve extra attention because their walls are exposed to humidity, cleaning, and frequent use. A durable, washable paint in an appropriate sheen protects the repair and makes future maintenance easier. Before painting near a backsplash, vanity, or trim, mask carefully and keep the workspace clean. Drywall dust can settle quickly on finished tile, countertops, and fixtures.
When a Professional Repair Is the Better Value
A homeowner can handle many small cosmetic repairs with patience and the right materials. Calling a professional makes sense when the issue involves water, multiple damaged areas, a large opening, cracked seams, recurring movement, or a wall that needs to be repaired around finished cabinetry, tile, trim, or plumbing fixtures.
It is also worth bringing in help when appearance matters as much as function. A patch in a prominent living room, a newly remodeled bathroom, or a kitchen with carefully selected finishes needs to disappear into the room, not become the first thing guests notice. Professionals have the tools to control dust, create stable backing, match textures, and prepare the wall correctly for paint.
At Renovation Innovations, drywall repairs are handled with the same detail-focused approach used for kitchens, bathrooms, tile, and corrective finish work. That means protecting nearby surfaces, addressing the condition behind the damage when needed, and leaving the area clean and ready for the next step.
Avoid the Shortcuts That Create Visible Patches
The most common drywall repair problems are usually preventable. Skipping primer, applying compound too thickly, sanding before the material is fully dry, and painting over a damp wall can all turn a small repair into a repeated project. Another frequent mistake is using a patch method that is too light for the opening. A large hole needs support, not just surface coverage.
Do not ignore cracks simply because they are narrow. A hairline crack may be a harmless result of seasonal movement, particularly in older homes. But a crack that widens, returns after repair, runs diagonally from a door or window corner, or appears with sticking doors and other movement signs may need further evaluation.
The best drywall hole repair is the one you stop noticing. Take the time to correct the cause, choose a repair method that matches the damage, and finish the surface with the same care you would give a new wall. A clean, well-blended repair protects both the appearance of your home and the quality of the work around it.
