






A beautiful shower can fail behind the tile long before anything looks wrong on the surface. In older Metro Detroit homes, that hidden damage may show up as a soft wall near the tub, peeling paint in the next room, loose tile, or a musty smell that returns no matter how often the bathroom is cleaned. This guide to waterproof shower walls explains what actually keeps water where it belongs and what details deserve close attention during a remodel.
Tile Is Not the Waterproof Layer
Tile, grout, and caulk create the finished look of a shower, but none should be treated as the primary waterproofing system. Grout is porous, and even well-sealed grout can absorb moisture. Caulk is flexible and useful at changes of plane, but it eventually needs maintenance. Water that gets through these surface materials needs a properly installed barrier behind or beneath the tile assembly.
A dependable shower wall system directs incidental moisture back into the shower pan rather than allowing it to reach framing, insulation, drywall, or adjacent rooms. That distinction matters most around corners, niches, plumbing openings, and the transition between wall and shower floor. These are the places where rushed work can create expensive problems later.
Standard drywall is not appropriate inside a tiled shower. Moisture-resistant drywall may have a place elsewhere in a bathroom, but it is not a substitute for a true shower waterproofing system. Cement board is also not waterproof on its own. It resists damage from moisture better than drywall, but it still requires a waterproof membrane when used in a wet shower area.
Choosing a Waterproof Shower Wall System
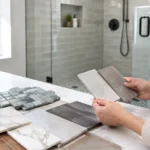
The right system depends on the shower design, tile selection, existing conditions, and budget. A straightforward tub surround does not require the same approach as a curbless shower with a large niche, bench, and frameless glass enclosure. The best choice is the one that provides a complete, compatible assembly, not simply the least expensive material at the start.
Sheet membranes
Sheet membranes are flexible waterproof layers installed over approved backer board or other compatible substrates. Their seams, corners, and penetrations are sealed with manufacturer-approved overlaps, banding, or adhesive. When installed carefully, sheet systems offer consistent thickness and a clearly defined waterproof layer directly behind the tile.
They are an excellent option for showers with multiple corners, built-in niches, benches, or complex layouts. The trade-off is that seam work must be precise. A membrane is only as reliable as its overlaps, corner treatment, and connection to the shower pan.
Liquid-applied membranes
Liquid waterproofing is rolled, brushed, or troweled onto the wall substrate and dries into a continuous membrane. It can work very well on straightforward shower walls and in areas where fitting sheet material is difficult. It also makes it easier to coat irregular surfaces.
The key concern is thickness. Applying liquid membrane too thin can leave weak spots, while applying it before the prior coat has cured can create problems of its own. A professional installation follows the product’s required coverage rate, number of coats, cure time, and reinforcement instructions at corners and joints.
Waterproof foam board systems
Foam shower boards are lightweight panels with a waterproof core and surface, designed to work with compatible fasteners, washers, seam treatment, and accessories. These systems can speed up installation and are especially useful when walls need to be flattened or shower features are being built from scratch.
They cost more than basic cement board, but the material can save labor and reduce opportunities for mixing incompatible products. As with any system, the fastener locations, joints, niches, and plumbing penetrations still need careful treatment.
The Details That Make or Break Waterproofing
The wall field is usually the easy part. Long-term performance comes down to the transitions. A quality installation treats the shower as one connected system, from the pan and drain to the walls and fixtures.
First, the substrate must be solid, plumb, and flat enough for the selected tile. Large-format tile is especially unforgiving of uneven walls. Correcting bowed studs or damaged framing before the backer board goes up helps prevent lippage, cracked grout, and poorly bonded tile later.
Next comes the wall-to-pan connection. Waterproofing on the walls must tie correctly into the shower pan or tub flange. The exact detail varies by system, but the goal is always the same: water should shed into the pan, not behind it. This is not a place for assumptions or improvised material combinations.
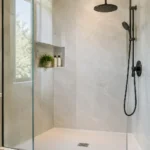
Niches need special attention because they interrupt the flat wall surface and create horizontal planes that can hold water. A properly built niche is fully waterproofed, has protected corners and seams, and slopes slightly toward the shower so water drains out. The same principle applies to benches, pony walls, curbs, and windows within the shower area.
Plumbing penetrations deserve equal care. Valve openings, shower arms, body sprays, and grab bars all create holes through the wall assembly. These areas should be sealed with compatible gaskets or approved membrane detailing, not simply covered by an escutcheon plate and caulk.
Finally, the waterproofed assembly should be protected while tile is installed. Deep notches, careless cuts, or unnecessary penetrations can compromise a membrane. Good tile craftsmanship includes respecting the work that sits behind the finished surface.
A Practical Guide to Waterproof Shower Walls During a Remodel
For a homeowner, the most useful questions are often about process. Before tile is set, ask what waterproofing system will be used, how it connects to the shower pan, and how niches and plumbing openings will be handled. You should receive a clear answer that identifies the materials and the sequence of work.
It is also reasonable to ask whether the shower pan will be flood tested when applicable. A flood test fills the completed pan to a controlled level before tile is installed, allowing the installer to confirm that the pan holds water and that the drain connection performs correctly. It does not replace proper wall waterproofing, but it is an important quality-control step for many shower builds.
Avoid relying on vague statements such as “we use cement board” or “the grout will be sealed.” Those answers describe only part of the assembly. A professional contractor should be able to explain the full system in plain language and account for the specific conditions in your bathroom.
If you are remodeling an existing shower, hidden damage may change the scope after demolition. Rotting subfloor, water-stained framing, mold-like growth, or a failed old pan should be corrected rather than covered. This is where experienced problem solving matters. A remodel should not just improve the appearance of the shower. It should address the reason the old shower failed.
Warning Signs of a Failing Shower Wall
Some issues call for a prompt inspection, especially when they appear outside the shower itself. Watch for soft drywall or bubbling paint on the opposite side of a shower wall, loose or cracked tile that keeps returning after repair, darkened grout lines near corners, persistent musty odors, or a floor that feels soft around the curb or tub edge.
A small caulk crack does not always mean the waterproofing has failed. Caulk commonly needs periodic replacement because walls and tubs move slightly over time. But recurring cracks, water staining, or tile movement can point to a deeper issue. Repairing the visible finish without finding the source may only delay a larger renovation.
Protecting the Finished Shower
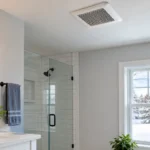
Once the shower is complete, regular care helps preserve the finish but does not need to be complicated. Use a nonabrasive cleaner suited to the tile and grout, keep the bath fan running long enough to clear humidity, and replace deteriorated caulk at corners or fixture trim. Avoid harsh acidic cleaners on natural stone and aggressive scrubbing tools that can damage grout or glazed tile.
For homeowners planning a new shower in Macomb County or the surrounding Metro Detroit area, Renovation Innovations approaches waterproofing as part of the finished craftsmanship, not an unseen shortcut. The right materials matter, but careful preparation, compatible system details, and accountable installation are what give a shower its staying power.
A shower should let you rest easy, not make you wonder what is happening behind the walls. Start with a clear waterproofing plan before choosing the tile, and the design you love will have the structure it needs to last.
